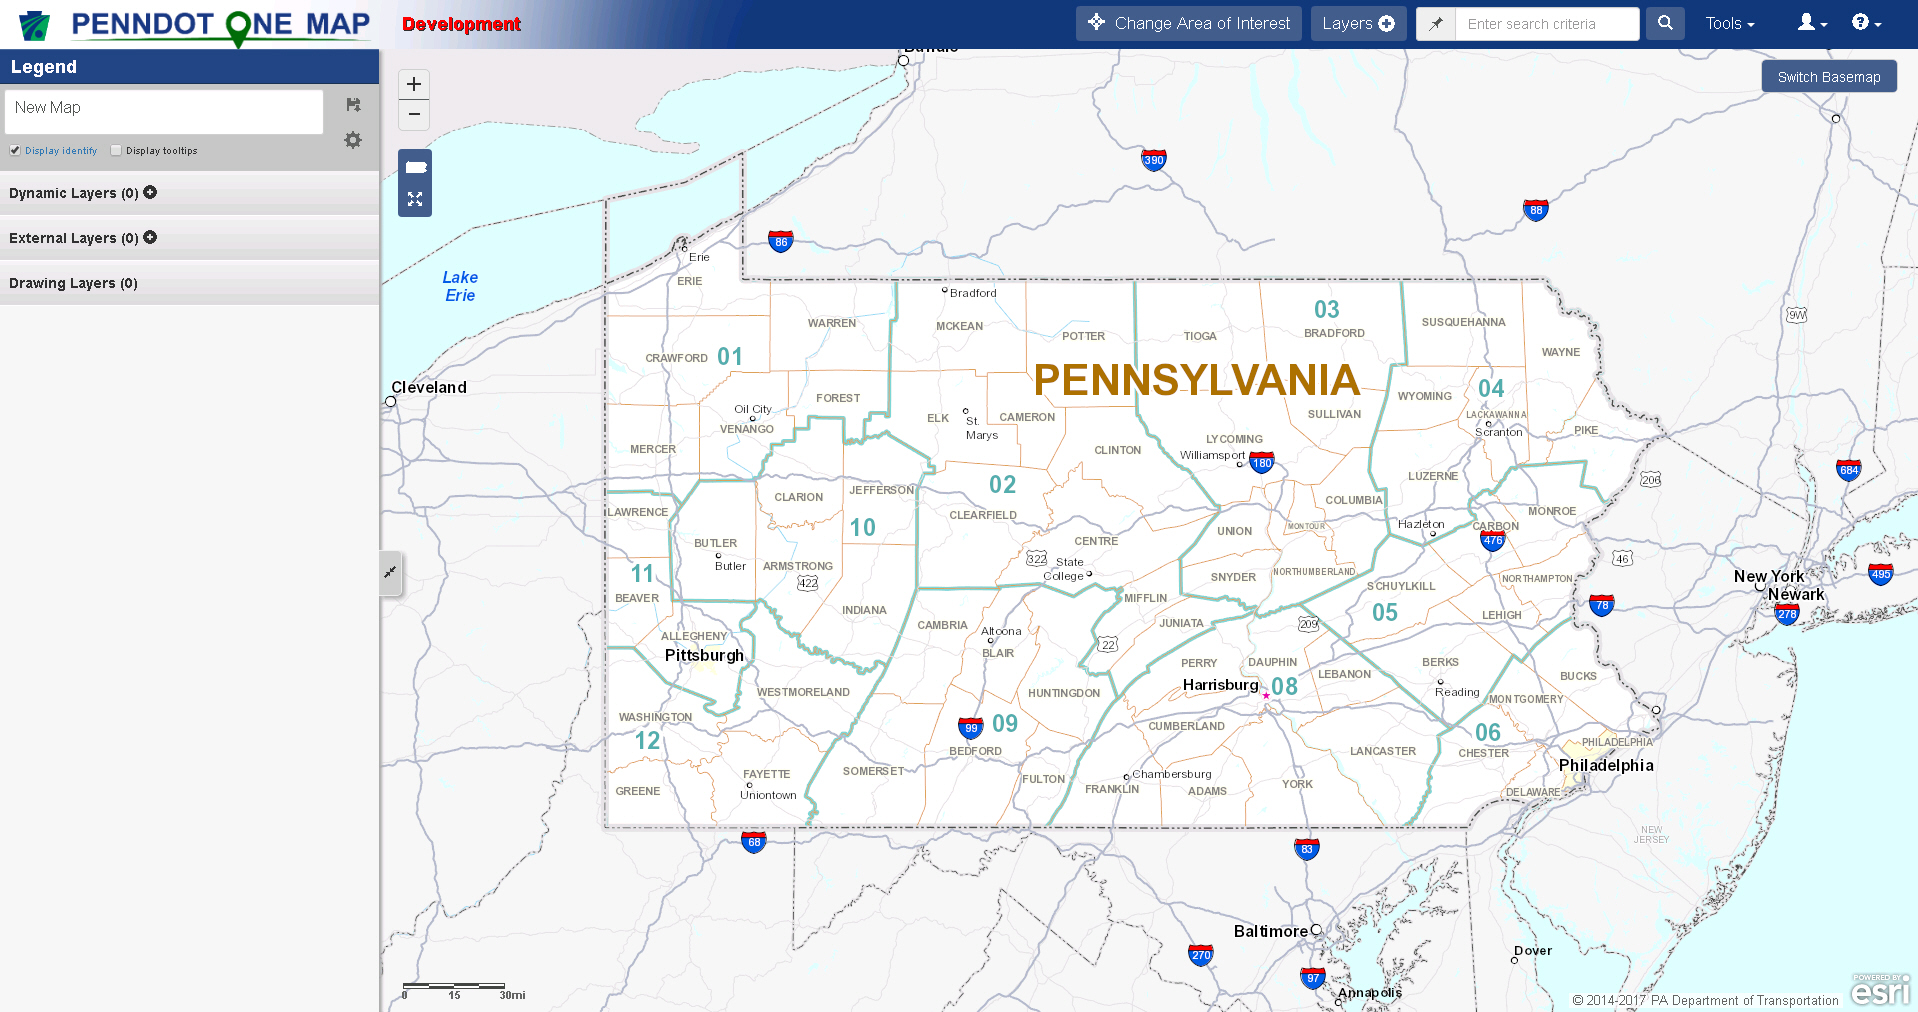
The PennDOT One Map Main Screen appears when you access the application. You can access all PennDOT One Map functions from this screen.
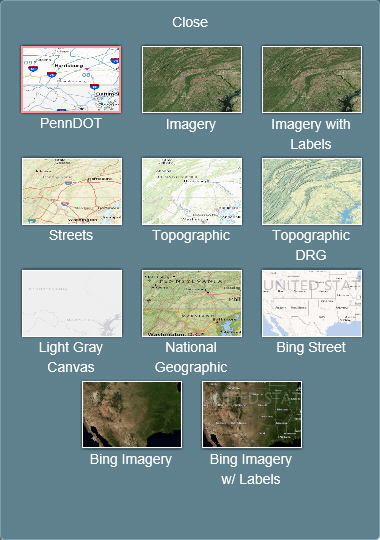
Switch Basemap (Upper right)- Click this button to bring up the Basemap menu, where you can select a different basemap.
Maps - Click this button to open the Maps window and select a map to view, share, or delete.
Layers - Click this button to open the Layers window to select layers to apply to the current map.
Tools - Click this button for a list of helpful applications. Options include:
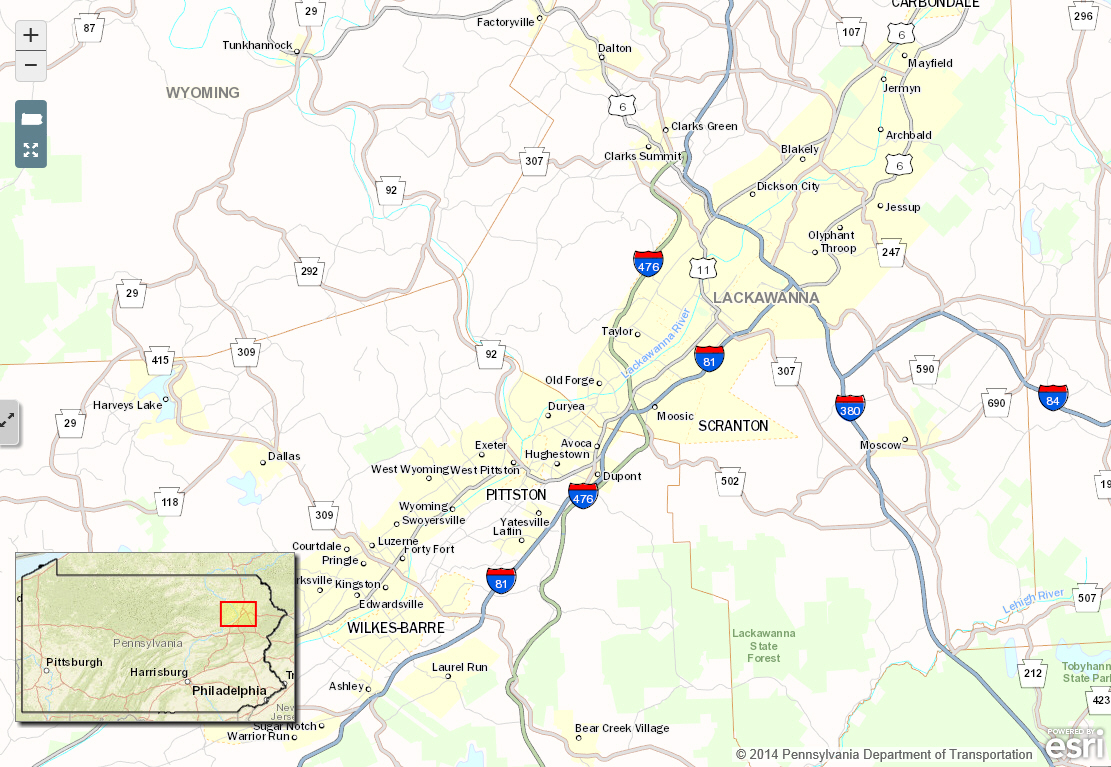
· Overview Map - Toggle that displays or hides an inset map showing the zoomed-in area against a map of the entire Commonwealth of Pennsylvania. Click here to show an example.
· Draw Tool - Provides tools for annotating a map.
· Measurement - Provides tools for measuring distance and area and obtaining Lat/Long coordinates for a point.
· Street View - Opens a window displaying the Google Street View of a location.
· Video Log - Opens a window displaying PennDOT's Video Log of a location.
· ISLE- STILL NEED DEFINITION
· Reports - Opens the report window. Available reports are generated based on the data currently displayed on the map. See Reports.
 (Search
Tips) - Click to display some helpful hints on using the Search
feature, including common formats.
(Search
Tips) - Click to display some helpful hints on using the Search
feature, including common formats.
Enter search criteria - Type words or names you want to search features or layers by.
Tip: You can search for more than one project number, BRKEY at once. Enter the numbers in the search criteria text box, separated by either spaces or commas.
Tip: You can search by intersection. Enter a phrase like "Forster and Front" or "32nd and Market" to display intersections matching the criteria.
 (Search) -
Click to search features or layers for the criteria entered.
(Search) -
Click to search features or layers for the criteria entered.
 (User)
- Click to show a menu with options for additional settings.
(User)
- Click to show a menu with options for additional settings.
· Default Extent - Select this option to set the current area and zoom level as your default.
· Bookmark - Select this option to save the current extent or recall a previously saved one.
 (Information) - Click to show a menu with options for additional
information.
(Information) - Click to show a menu with options for additional
information.
· About - Select this option to display a description of this system.
· Help - Select this option to display the help file.
· Contact Us - Select this option to display an email link to use when you have questions comments or issues concerning this system.
The Legend sections displays the name of the current map and lists all data layers and annotations applied to the map.
 (Collapse/Expand) - Click this
button to collapse the Legend section. When the Legend section is collapsed,
click this button to restore it.
(Collapse/Expand) - Click this
button to collapse the Legend section. When the Legend section is collapsed,
click this button to restore it.
The top of the Legend/TOC section contains the name of the selected map or "New Map" if no map is currently selected.
You can change the name of the map by clicking the map name and typing a new one.
Display Tooltips - Click this checkbox to enable tooltips--pop-up windows that provide information when you hover the mouse over a map feature.
 (Map Menu) - Click this icon to
display a menu of map-related tools. These tools are described below.
(Map Menu) - Click this icon to
display a menu of map-related tools. These tools are described below.
![]() (Maps)
- Click this icon to open the Maps window and select a map to view,
share, or delete.
(Maps)
- Click this icon to open the Maps window and select a map to view,
share, or delete.
![]() (Layers) - Click this icon
to open the Layers window to select layers to apply to the current map.
(Layers) - Click this icon
to open the Layers window to select layers to apply to the current map.
![]() (Save Map) - Click this icon to
save the map so you can access it later.
(Save Map) - Click this icon to
save the map so you can access it later.
![]() (Share Map) - Click this icon
to share a direct link to this map via email.
(Share Map) - Click this icon
to share a direct link to this map via email.
![]() (Print Map) - Click this icon
to generate a PDF file of the map that you can save or print.
(Print Map) - Click this icon
to generate a PDF file of the map that you can save or print.
![]() (Export Map) - Click this icon
to export a map as a Microsoft Excel (.xlsx) file that contains a picture
of the map and data for each layer.
(Export Map) - Click this icon
to export a map as a Microsoft Excel (.xlsx) file that contains a picture
of the map and data for each layer.
 (Open All Data Grids) -
Click this icon to open data grids for all layers in the map.
(Open All Data Grids) -
Click this icon to open data grids for all layers in the map.
 (
Spatial Query Tool)-Click this icon to access the Spatial query
tool.
(
Spatial Query Tool)-Click this icon to access the Spatial query
tool.
![]() (Import
AGOL Map) - Click this icon to import public AGOL map from
the web.
(Import
AGOL Map) - Click this icon to import public AGOL map from
the web.
The Dynamic Layers section contains a list of layers on the map.
The Dynamic Layers section contains a list of layers on the map. Click
 (Show Layer Description) for any
layer to display that layer's details.
(Show Layer Description) for any
layer to display that layer's details.

Click Show SQL to view the SQL details for the layer.
Reset - Click to reload all layers of the current map.
 (Layer Menu) - Click this icon
to display a menu of layer-related tools. These tools are described below.
(Layer Menu) - Click this icon
to display a menu of layer-related tools. These tools are described below.
![]() (Filter Layer) - Click this icon
to filter the layer by a data element or geographic boundary.
(Filter Layer) - Click this icon
to filter the layer by a data element or geographic boundary.
![]() (View Data Table) - Click this
icon to open the data table, a spreadsheet like view of the layer's data.
(View Data Table) - Click this
icon to open the data table, a spreadsheet like view of the layer's data.
![]() (Zoom to Layer) - Click this icon
to zoom the map to the extent of the selected layer.
(Zoom to Layer) - Click this icon
to zoom the map to the extent of the selected layer.
![]() (Theme Layer) - Click this icon
to apply a theme to a layer. Click
here for more information.
(Theme Layer) - Click this icon
to apply a theme to a layer. Click
here for more information.
![]() (Spatial Query Tool) -
Click this icon to spatially intersect or difference two layers in the
legend. Click here for more information.
(Spatial Query Tool) -
Click this icon to spatially intersect or difference two layers in the
legend. Click here for more information.
![]() (Buffer
Layer)-to display buffer controls for showing a given distance
or distances around the selected feature
(Buffer
Layer)-to display buffer controls for showing a given distance
or distances around the selected feature
![]() (Export Layer to Shapefile) -
Click this icon to export the layer as a shapefile that can be opened
with appropriate mapping software.
(Export Layer to Shapefile) -
Click this icon to export the layer as a shapefile that can be opened
with appropriate mapping software.
![]() (Export Layer to Excel) - Click
this icon to export the layer's data to a Microsoft Excel (.xlsx) file.
(Export Layer to Excel) - Click
this icon to export the layer's data to a Microsoft Excel (.xlsx) file.
![]() (Save Layer) - Click this icon to save
a copy of the layer to My Layers so you can access it later.
(Save Layer) - Click this icon to save
a copy of the layer to My Layers so you can access it later.
![]() (Share Layer) - Click this icon
to share a direct link to this layer via email.
(Share Layer) - Click this icon
to share a direct link to this layer via email.
Note: You can only share a layer that appears in My Layers. Use the Save Layer icon to save a copy of the layer before sharing it.
![]() (Copy Layer) - Click this icon to
create a copy of this layer on the map.
(Copy Layer) - Click this icon to
create a copy of this layer on the map.
 (Labels)-
Click this icon to
select a column, and click Apply Label
Settings. The labels then appear above the features on the map
.
(Labels)-
Click this icon to
select a column, and click Apply Label
Settings. The labels then appear above the features on the map
.
![]() (Remove Layer) - Click this
icon to remove the layer from the map.
(Remove Layer) - Click this
icon to remove the layer from the map.
 (Clustering) - Click this icon to group
multiple features together and make the map easier to read.
(Clustering) - Click this icon to group
multiple features together and make the map easier to read.
The External Layers section contains a list of layers linked by a URL on the map. External layers can also be accessed from Layers tab.
The Drawing Layers contains annotations or highlights added to the map through various tools.
To remove a drawing layer, click the  next to it.
The Map section displays the selected basemap, along with any data layers and annotations applied to it.
The controls are designed to be similar to Internet-based mapping applications you may be familiar with.
When first loaded, PennDOT One Map displays the entire Commonwealth of Pennsylvania by default. You can zoom in an out using these map controls:
 (Zoom In) - Click this button
to zoom in to view more detail.
(Zoom In) - Click this button
to zoom in to view more detail.
 (Zoom Out) - Click this button to
zoom out to view more area.
(Zoom Out) - Click this button to
zoom out to view more area.
 (Reset Zoom) - Click this button
to reset the zoom to include all of Pennsylvania.
(Reset Zoom) - Click this button
to reset the zoom to include all of Pennsylvania.
 (Default Zoom)
- Click this button to reset the zoom to your default area.
(Default Zoom)
- Click this button to reset the zoom to your default area.
Tip: You can also use your mouse's scroll wheel (if available) to zoom in and out.
You can pan the map by clicking the mouse and dragging the map along the screen.
An inset map on the bottom left shows the currently zoomed-in area against a map of the entire Commonwealth of Pennsylvania. Click Overview Map in the Tools menu to turn this feature on or off.
Click a point on a map to display the Layer information window. This window displays layer data about the selected point.
Note: When you click a access the Photo layer, the Layer information window will include images , if available.