for the layer you want to theme.
Theming a layer allows you to quickly create several sub-layers based on a selected attribute of the currently selected layer.
For example, if you have loaded the "Bridges - All" layer, you can create sub-layers color coded by calendar year.
Once a theme is applied, you may work with each generated sub-layer as you would normally, with few exceptions.
Note: You may not theme sub-layers.
Tip: Once a theme is applied, displaying the parent layer will hide the sub-layers.
To theme a layer:
1. Under TOC/Legend,
click for the layer you want to theme.
2. Click ![]() (Theme Layer).
(Theme Layer).
The Theme Layer window appears.
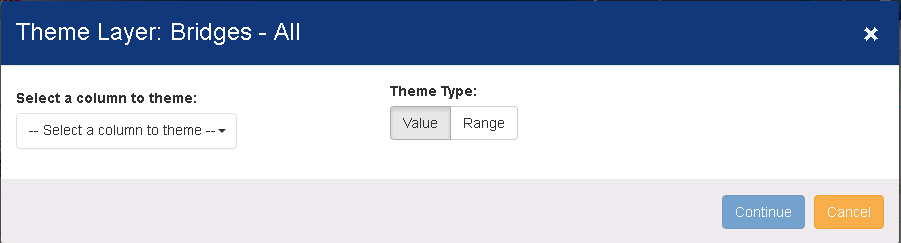
3. Select an
attribute from the Select a column to
theme drop down list.
Options appear, depending on the attribute selected.

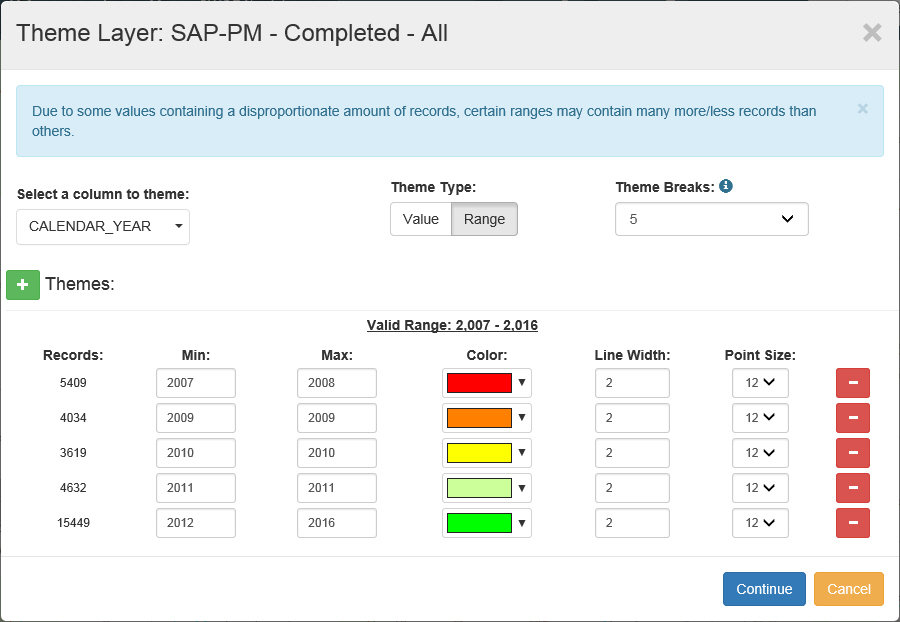
Tip: You can theme a layer by value or range. Click the Value or Range button under Theme Type. When theming by range, you may allow PennDOT One Map to automatically distribute the values across a number of breaks you select, or you may manually enter the ranges you want. Click here for an example of the Theme Layer window with Ranges selected.
4. Clear the
checkboxes for all sub-layers you wish to remove from the theme.
OR
Continue with step 5 to leave all sub-layers selected.
5. Select a
Color, Line
Width, and Point Size for
each sub-layer.
OR
Continue with step 6 to accept the default values.
6. Click Continue.
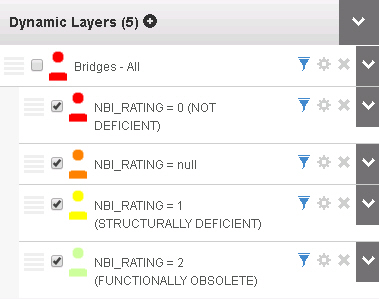
The sub-layers appear below the main layer in the Dynamic layer section.
Tip: To remove a
theme click the for the main layer and select the ![]() (De-Theme Layer)
icon.
(De-Theme Layer)
icon.